
In this project, we created a prototype for a mobile AR app to achieve virtual notes. The overall process include:
I'm the developer of the team and I also assisted the design team and the modeler with their work.

When exploring the application of mobile Augmented Reality Technologies, we proposed the Virtual Notes, which could potentially replace the paper post-its, which is a more sustainable option and is not restricted by the paper size, and could potentially incorporate videos, sounds and other digital elements.
Considering the limited time frame, the goal of our app is not to develop a fully functional app, but to create a partially functional prototype that could inform users of our idea and illustrate the interactions. So our first step is to find a use case for our demo. After consideration, our team decided to create virtual notes for equipments at NYU's makerspace due to frustrations we encountered.

The NYU Tandon MakerSpace is a workspace lab created to foster collaborative design projects...... It highlights new kinds of iterative, interdisciplinary teamwork using cutting-edge tools of rapid prototyping and digitally driven production.
NYU Tandon's MakerSpace has various machines for staffs and students to use. The Laser Cutter, especially enjoys popularity among students for rapid prototyping. To use these machines, people need to go through a 2-part training, one online and the other in-person. The operation of these machines sometimes contains multiple steps that could confuse the users.

The online training usually contains video tutorials and quiz. The whole process could be passive, dull and of low productivity. Also, the tutorial doesn't have timestamp indicating the content.

The in-person training needs to be scheduled ahead of time, so here a lot students encounter the problem of time gap between online and in-person training. It's of higher chance that the users will forget the content in the online tutorials. Based on our interview, we can also indicate that most users won't review the online training.
For the in-person training, it's usually one mentor with multiple students. MakerSpace is usually loud and crowded, so it's possible that users will miss the key points of the orientation. During the training, students will watch the mentor operates for one time, there have been cases where users think they know how to use the machine while watching while they don't. In this scenario, two popular solutions are: 1. Ask the mentor again for help. 2. Go through the online training again from the beginning. Both options could be low efficient, and even dangerous when the misuse could lead to safety issues.

Just as many people use post-its to help them remember, we could introduce virtual notes attached to the corresponding parts of the machine. Compared to paper notes, virtual notes are more sustainable, and easier to manage, and less likely to get lost or contaminated.


We then brainstormed for potential functionalities of AR notes. We envision it as a AR version of Google Doc. However, considering the 1 month time limit, we chose to focus on more feasible and basic functions, which are in-editable public instructions that are official and visible to everyone, and private and editable notes to self.
The next step is persona creation and user journey development. We created a persona Jason who needs to use the laser cutter for his class project, but the trainings are not enough for him to remember everything. However, with virtual notes, he is able to check things instantly and leave his own notes to aid learning.


Our original idea is attach virtual notes to the real object. But we switched the direction considering the technical difficulty such as identifying and locating real-world object.
We eventually decided to use the more traditional way. Users will use their phone to scan the QR code on the machine and then they'll see a realist 3D model which has virtual notes in different parts.
This interaction could add to the playfulness of the whole process because the users will be able to interact with the 3D Model.


Our 3D modeler first gathered reference images from online and then use the scanned the real laser cutter at the makerspace to generate the initial model.
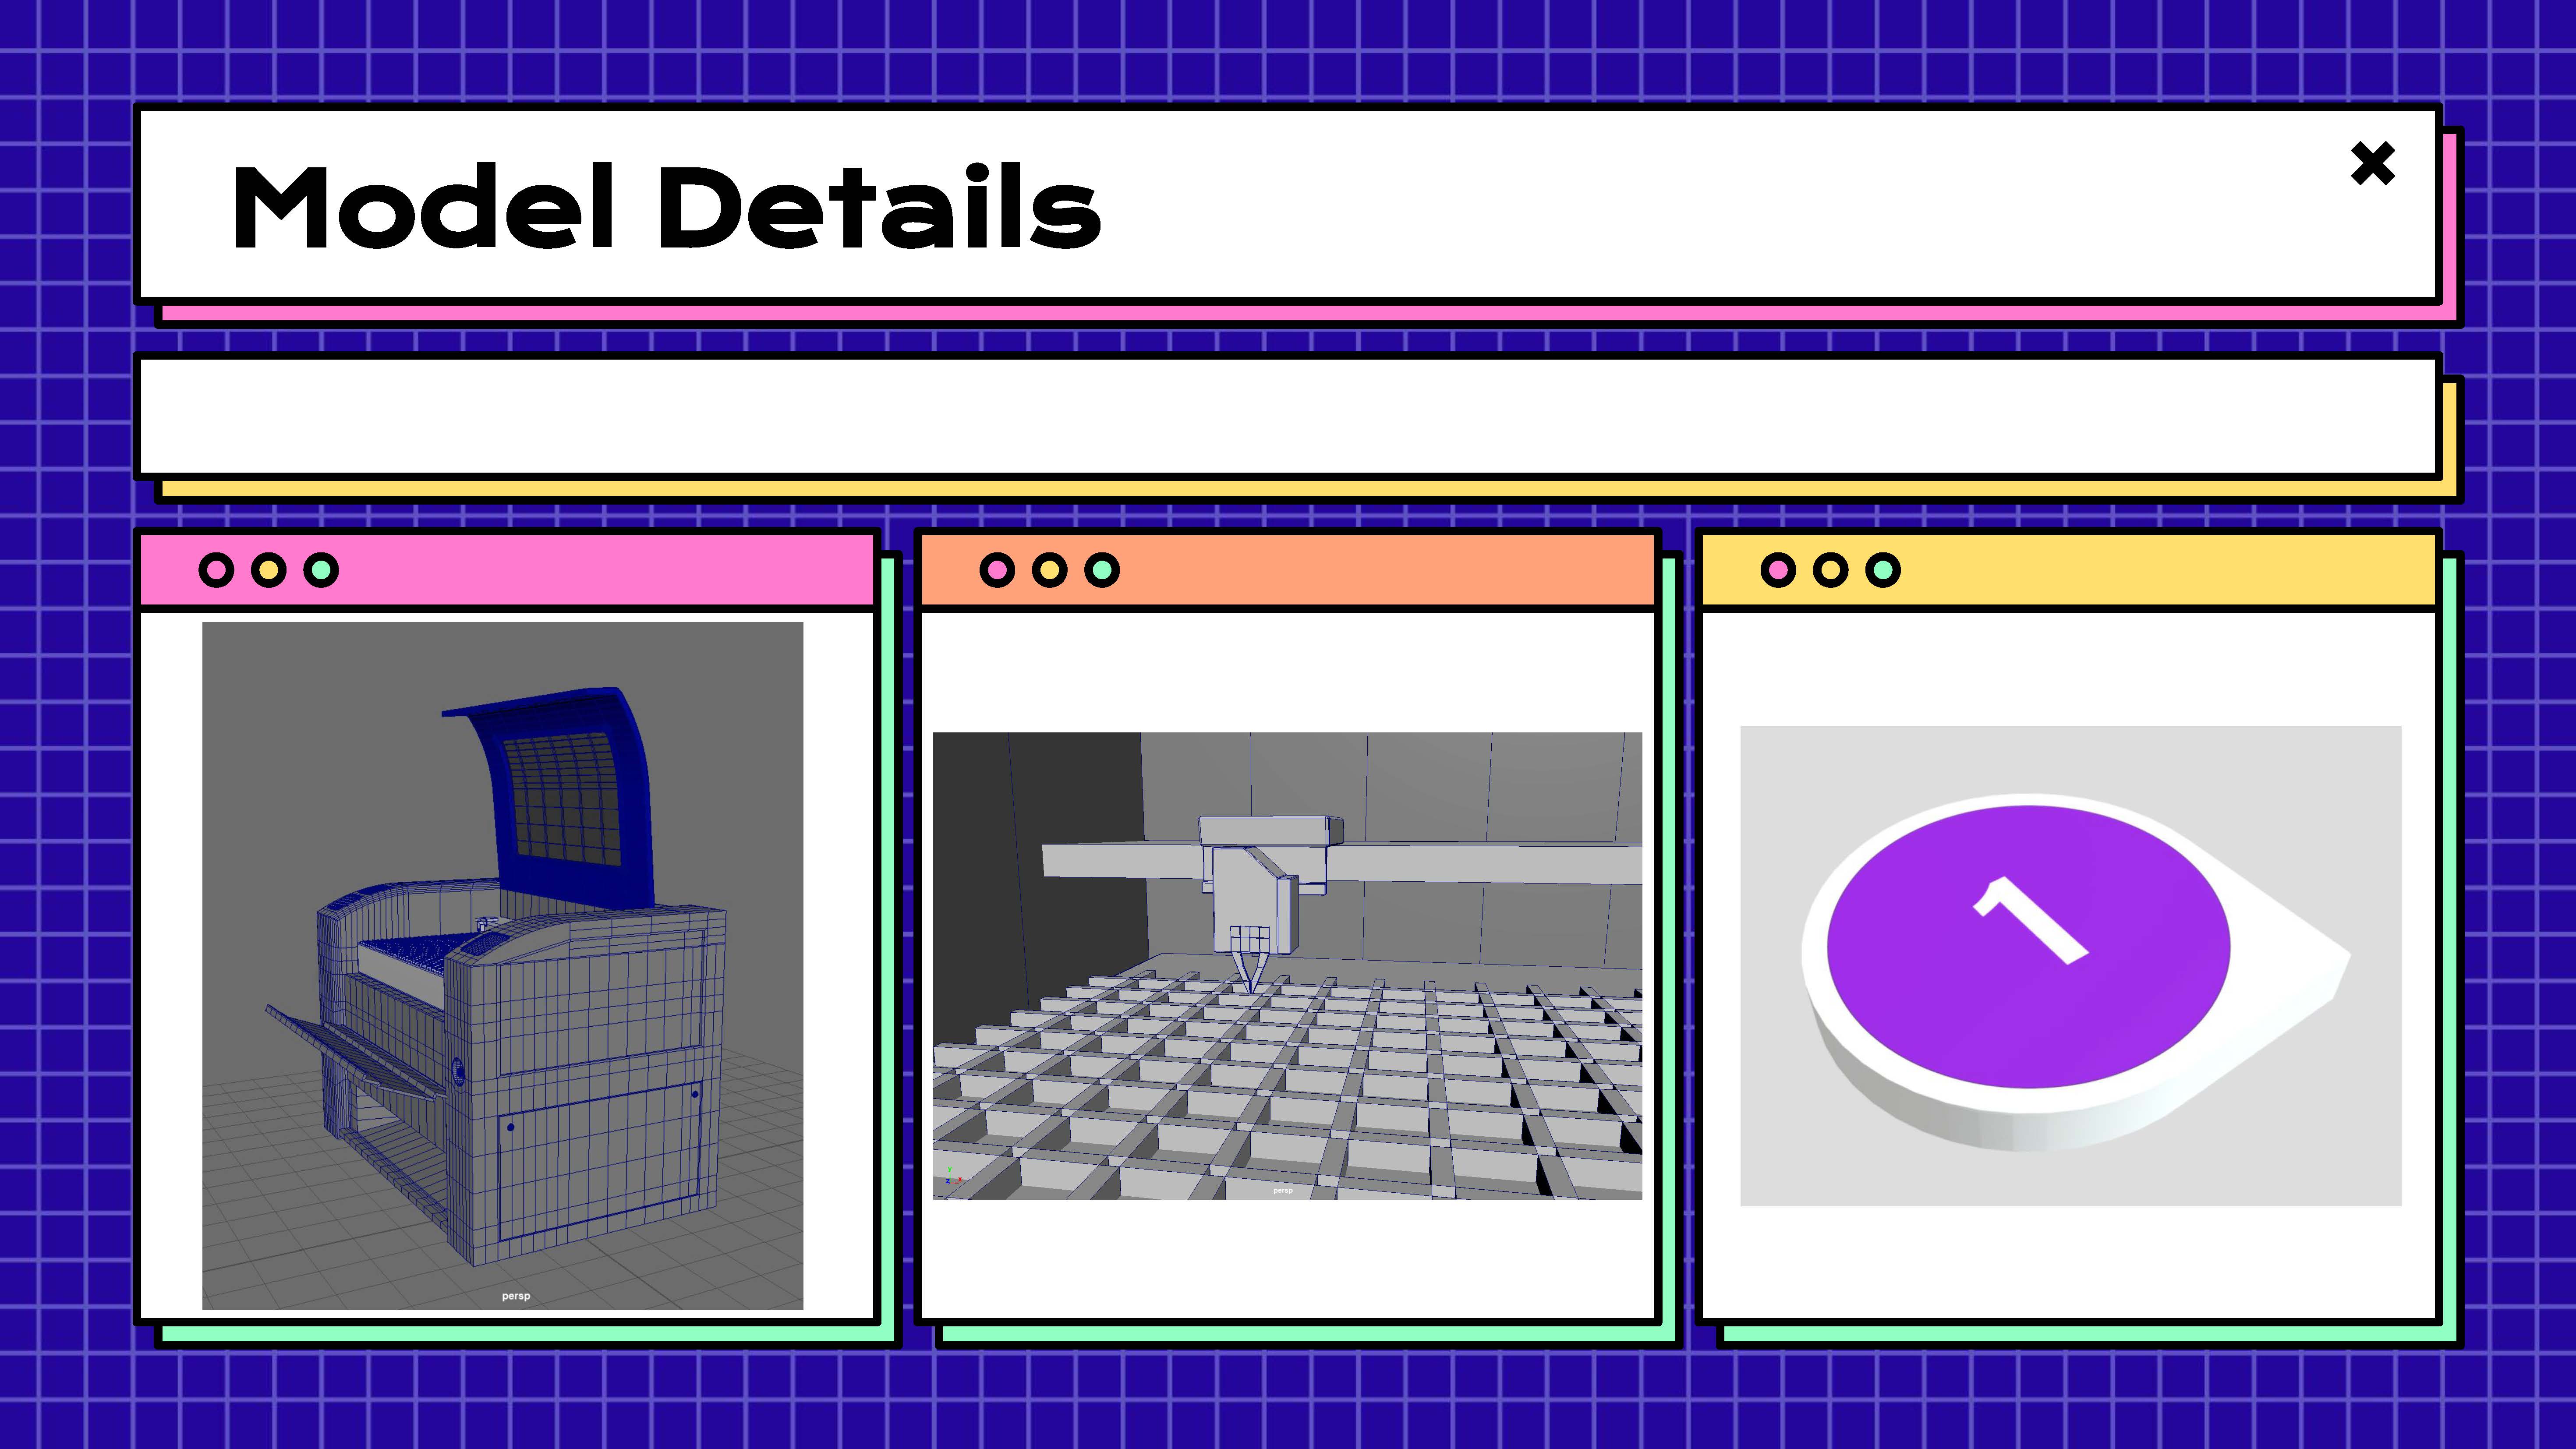
Then he clean up the model and added more details, including texture and the inner part. He also creates a tag model based on the UX design.

The design team referenced the NYU style guide for our app, because the target audience of our app are NYU affiliates. For the fonts, we choose the SF UI Display for a modern and lively feeling.

The design team also worked on the logo design which pursues simplicity through clean geometry and lines.

For the name of our app, we took inspiration from both the name of the MakerSpace and the Google Lens (AR and Camera). We chose the name MakerLens as the final name.
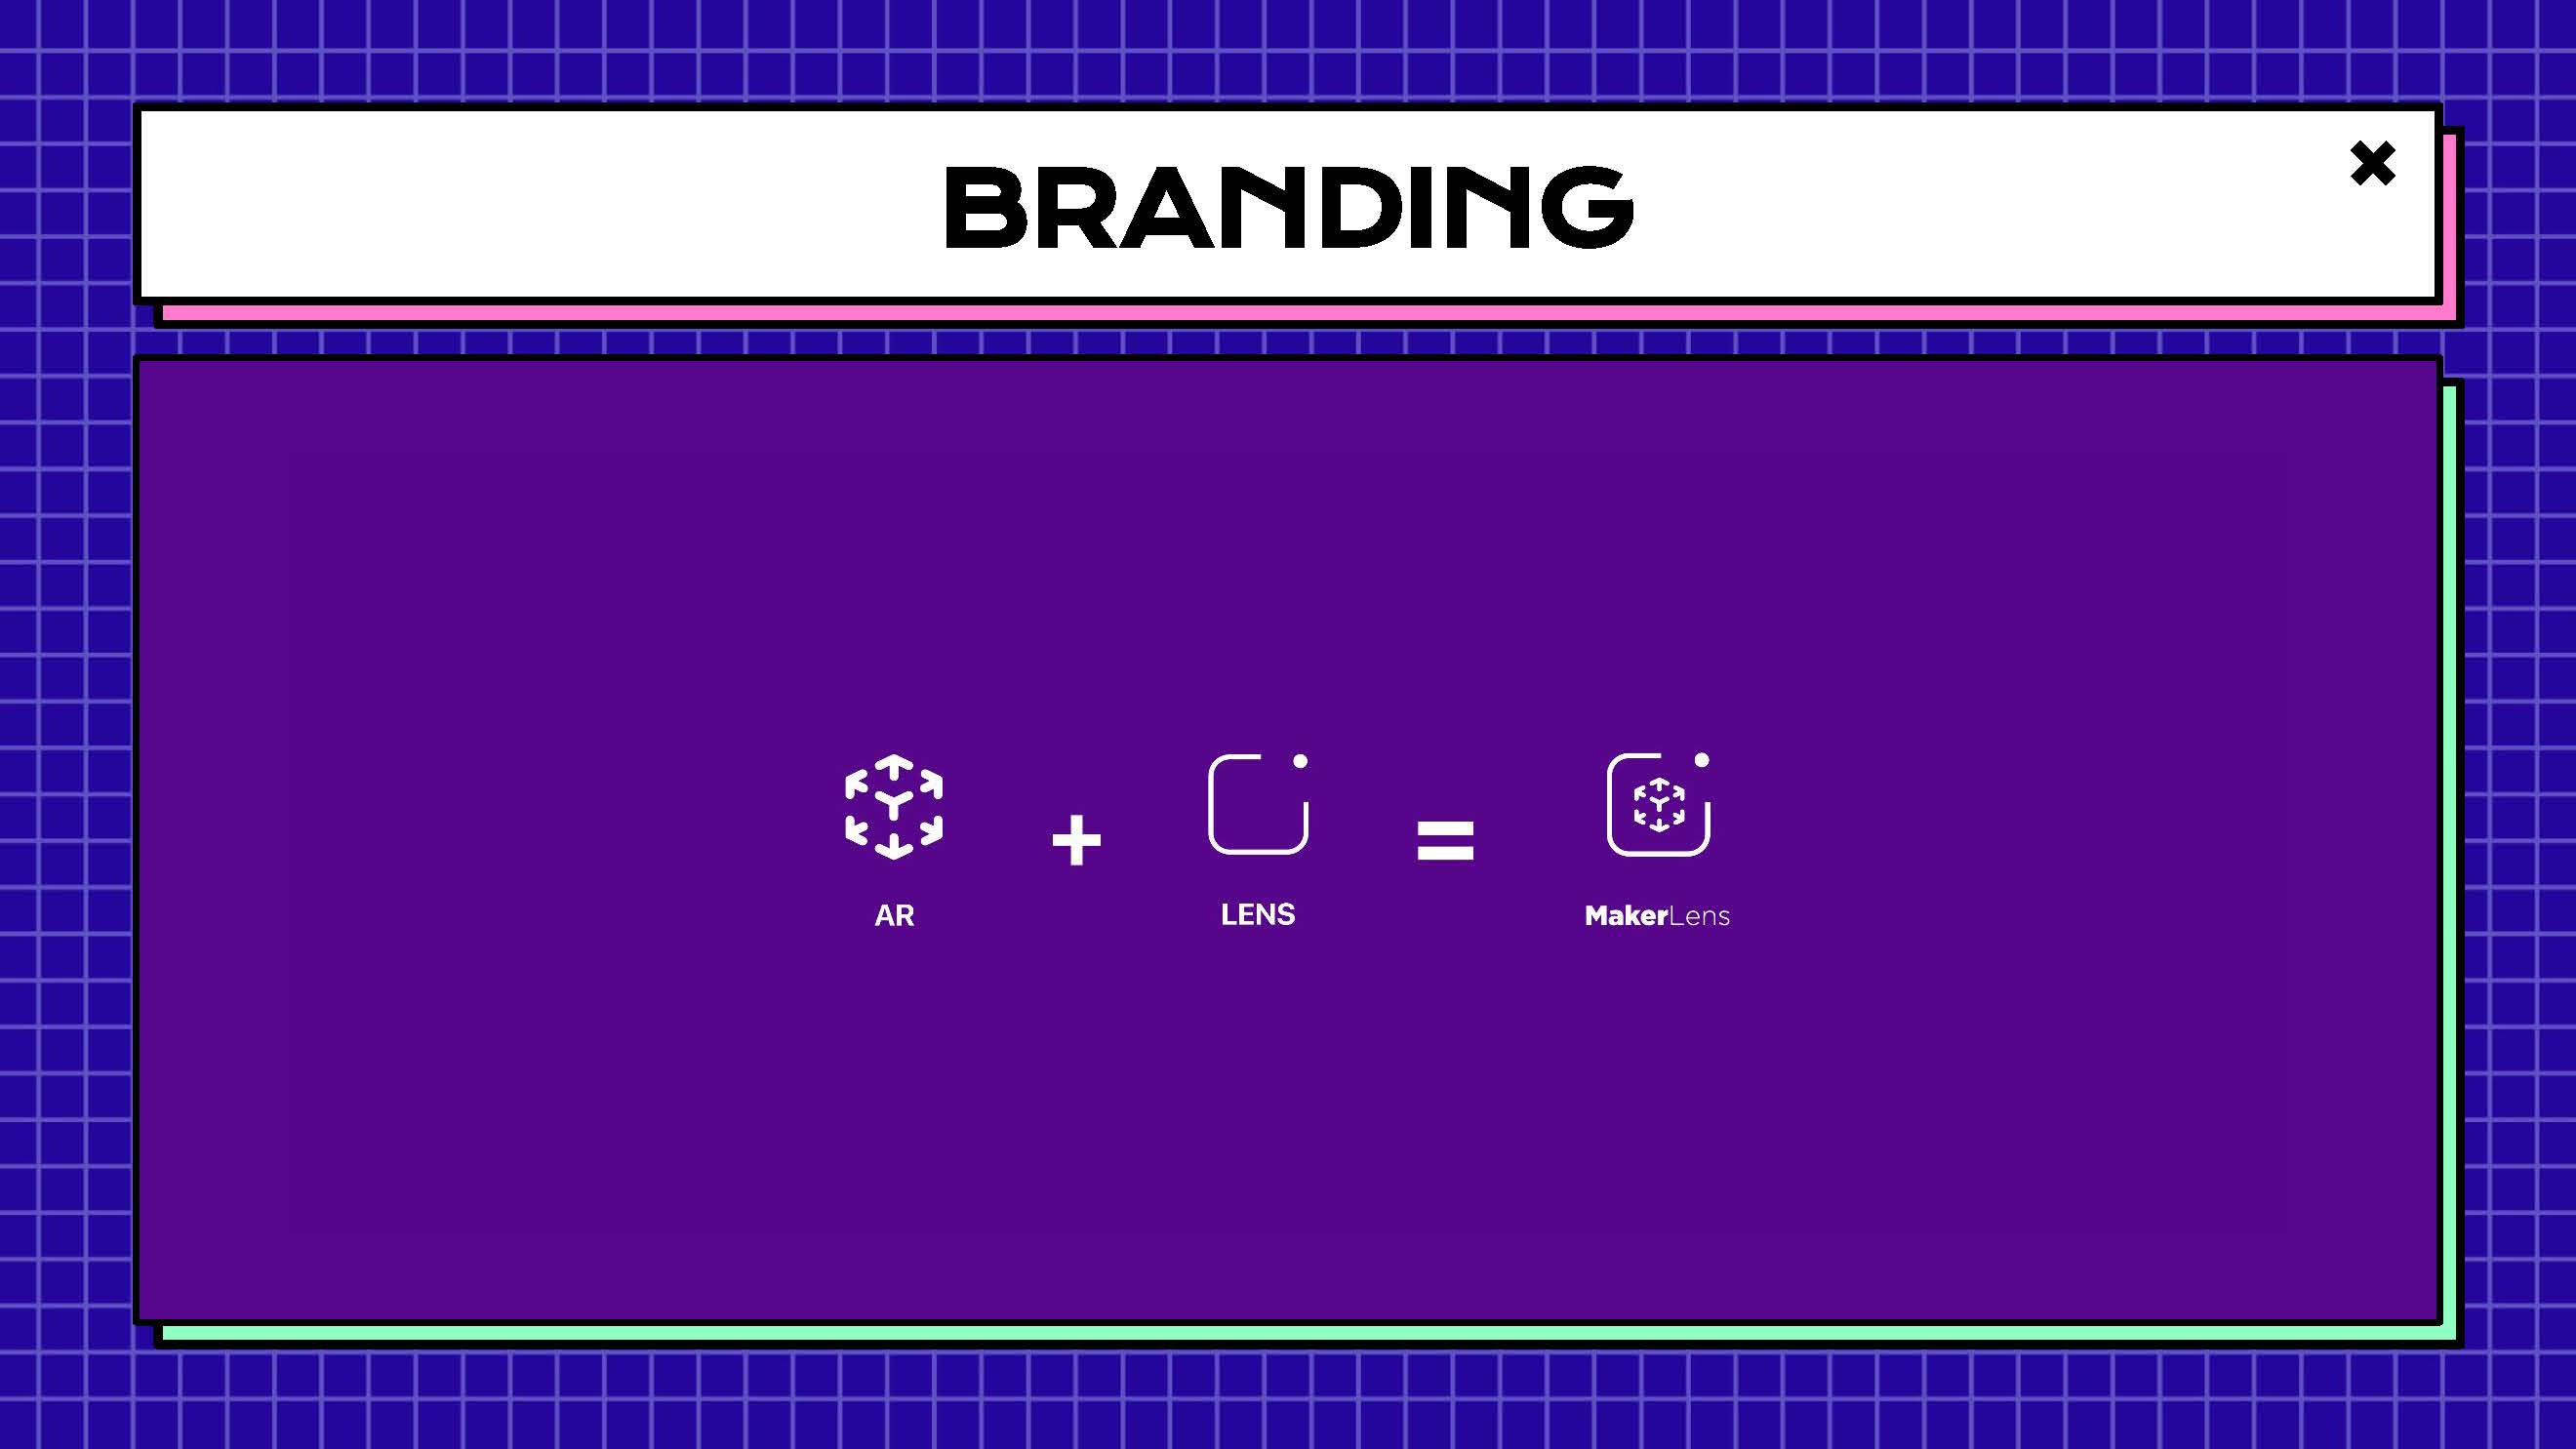
Based on the name, we combined the feature of AR and Lens and came up with the final logo.
For the UI, the design team continued the minimalist design. Based on the two main functions: Instructions & Notes, there are two tabs for users to choose from. For the wireframe, we didn't include the login/account profile page because registration is not required to add personal notes, in case some users don't want to register.
As the developer of the team, I translated the UI design into codes with Swift UI and Reality Composer under the guidance of our professor.

The scanning function is achieved with a modified template in Reality Composer.


I was able to import instructions and the model into Reality Composer, making the interactive through Xcode. The user interface is also interactive through Swift UI. Users could tap on the tag model to open up corresponding instructions.

The Noes Tab is where I encountered problems. I was able to create the input box, but this is not linked to any database and therefore could not be stored.

Another challenge was to drag and drop the notes to the model.
Because I was the only developer in the team and I didn't have experience with Xcode before, I could tackle these two technical issues within the 1 month timeframe. For the purpose of this class, our outcome already met the standard, we "faked" the functions of adding notes with Adobe Premiere Pro.
(Image by rawpixel.com on Freepik)

